
I’ve been making No-Knead Bread for over six years since first blogging about it here in 2010. Since then, I feel like I’ve really refined the process and found the techniques that develop the best no-knead bread for my tastes. Because my technique has changed quite a bit, I’ve decided to totally revamp this recipe from its original 2010 version, in effort to offer you the best recipe ever.

No-Knead Bread Best Practices
After making this bread a bazillion times, I’ve identified two techniques that really make all the difference: a long fermentation and using a Dutch oven for baking. Sure, you can let this dough ferment or rise for as short as two hours, but I find that a 12-18 hour fermentation creates a much superior flavor and texture.
Likewise, you can bake this bread on a baking sheet (instructions at the bottom of the post), but using a Dutch oven traps moisture as it bakes and creates and extra crispy and crunchy crust. So, I’m writing the recipe using these two techniques below, but you can find tips at the bottom of the post for adjusting the recipe if you can’t use this exact method.
What Dutch Oven do You Use?
The Dutch oven I used below is this 5-quart Lodge Cast Iron model, which retails for around $35 (here’s one by Westinghouse that is even less!). This is a really versatile piece of cookware, so I think it’s well worth the $35. You can also use an enamel coated cast iron, like this one made by Bruntmor. The key is that it needs to be something really heavy and thick so that it holds and radiates heat well, and it must have a lid. A thick stoneware or glass dish may also work, but probably not as well as cast iron.
Only 1/4 tsp Yeast?? Is that Right?
Letting the dough ferment for an extended amount of time also allows you to use much less yeast because the yeast has plenty of time to reproduce and grow. And lastly, that long fermentation creates an incredible flavor. Almost half way between a regular bread and a sour dough. It’s truly wonderful.
So, let your dough sit out at room temperature for at least 12 hours, or up to 18 hours, and if it needs to sit any longer than that because you are not available to bake the bread at that time, just pop it in the fridge until you’re ready. It will still ferment in the fridge, but at a much slower rate, allowing you to bake it when you’re ready.

No-Knead Bread
Ingredients
- 3 cups all-purpose flour ($0.29)
- 1/4 tsp instant or bread machine yeast ($0.02)
- 1/2 Tbsp salt ($0.02)
- 1.5 to 1.75 cup water* ($0.00)
Instructions
- The day before baking, combine the flour, yeast, and salt in a large bowl and stir until they’re well combined. Stir in about 1.5 to 1.75 cups room temperature water until a shaggy, sticky ball of dough forms and there is no dry flour left on the bottom of the bowl. Cover the bowl loosely with plastic and let it sit at room temperature for 12-18 hours.
- When you’re ready to bake, sprinkle a little flour on top of the fermented dough, and scrape it out of the bowl (the dough should be very light, fluffy, and bubbly by this time). With well floured hands, shape the dough into a ball and place it on a piece of parchment paper. Let the dough rise for 30-60 minutes.
- While the dough is rising, preheat the oven to 425ºF, or the highest recommended temperature listed on the packaging for your parchment paper. Place the Dutch oven inside the oven as it heats, and make sure it sits in the fully heated oven for at least 15 minutes before baking the bread.
- Once the bread has risen and the Dutch oven is fully heated, carefully remove the Dutch oven from the oven (it will be EXTREMELY hot). Lift the parchment with the dough straight into the dutch oven and cover it with the lid.
- Return the Dutch oven to the oven and bake for 30 minutes. Carefully remove the lid and bake for another 15-20 minutes, or until the crust is a deep golden brown. Remove the Dutch oven from the oven, lift the bread out by by using the parchment paper, and allow it to cool before cutting open and serving.
See how we calculate recipe costs here.


Notes
Nutrition

How to Make No-Knead Bread – Step by Step Photos

Before you begin, make sure you have “instant yeast” or “bread machine yeast” rather than “active dry”. The reason you need this type of yeast specifically is because it does not need to be kick-started by mixing with warm water first. You can add it to a recipe dry and it will still activate. I buy these little jars, which I keep in my fridge, and they last for-ev-er (especially when you’re only using 1/4 tsp at a time)!
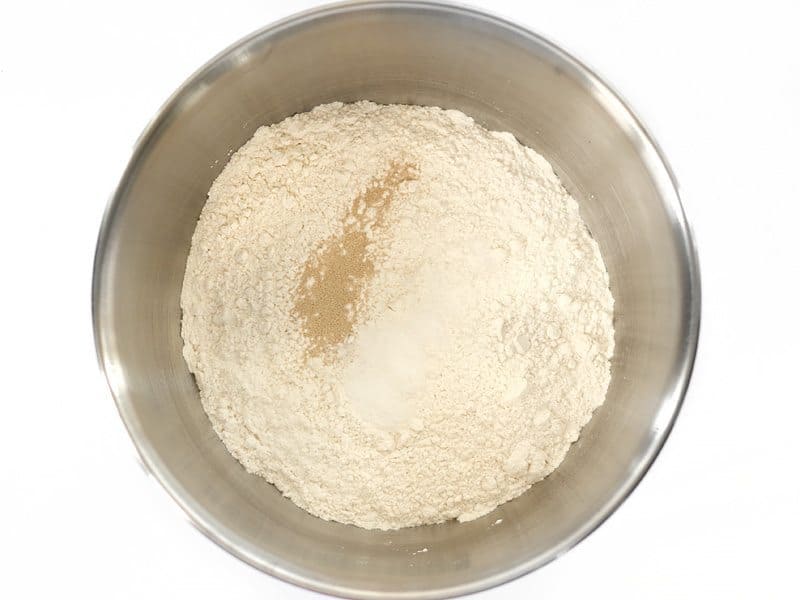
The day before you want to actually bake the bread, combine 3 cups all-purpose flour, 1/4 tsp instant or bread machine yeast, and 1/2 Tbsp salt in a large bowl. Stir them together really well.
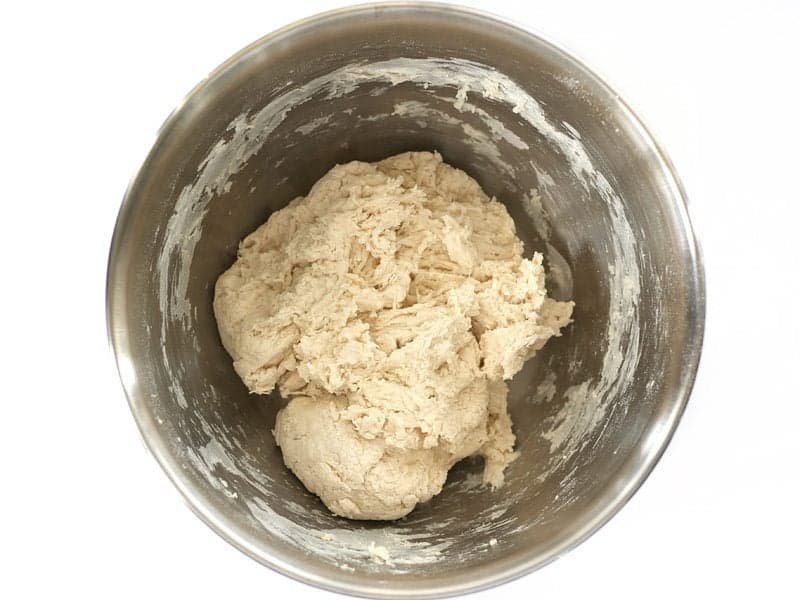
Stir in about 1.5 to 1.75 cups of room temperature water, or just enough to form a shaggy ball of slightly sticky dough, and no dry flour is left on the bottom of the bowl. The total amount of water needed may vary from time to time depending on the ambient humidity and moisture content of the flour, so go on visuals here. Make sure it comes together in one ball and no dry flour is left on the bottom of the bowl. It’s okay for it to be a bit sticky.
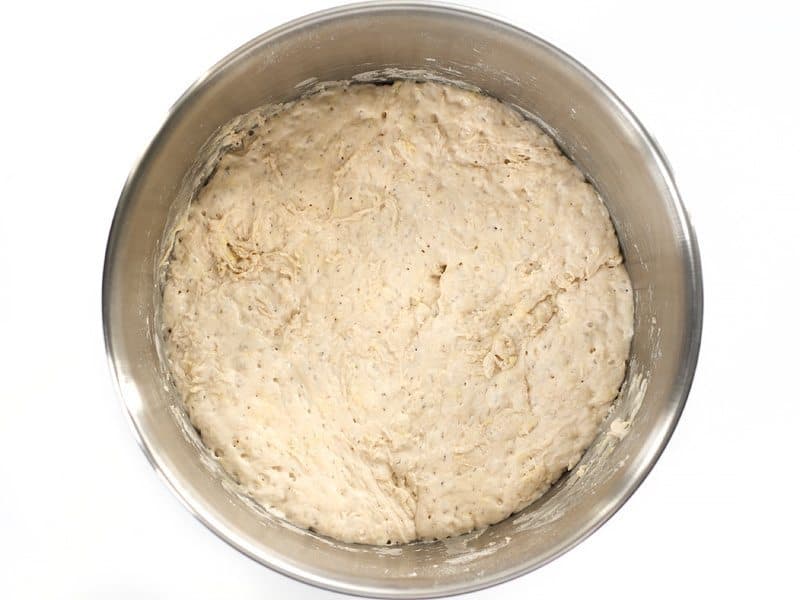
Loosely cover the bowl with plastic and let the dough ferment at room temperature for 12-18 hours. If you need to let it sit longer than that to fit your schedule, just transfer it to the refrigerator. As the dough ferments, it becomes very big, light, fluffy, and bubbly.

Sprinkle a little flour onto the dough (because it will be sticky) and scrape it out of the bowl. It will begin to deflate as you scrape it out.

Using floured hands, shape the dough into a ball, then place it on a large piece of parchment. Let the dough rise for 30-60 minutes. The shorter rise time will produce a slightly more dense bread and the longer rise time will have larger bubbles.

While the dough is rising, begin to preheat the oven and the Dutch oven. Set the oven to 425ºF, or whatever the highest safest temperature is for your brand of parchment (it will usually be listed on the box somewhere). Make sure your Dutch oven is inside the oven as it preheats, and then let it heat for an additional 15 minutes or so once the oven is up to temperature. This makes sure that the Dutch oven is nice and hot.

When the dough is risen and the Dutch oven is fully preheated, carefully remove the Dutch oven from the oven (it will be extremely hot!). Lift the risen dough by the parchment and place it inside the Dutch oven, parchment and all. Place the lid on the Dutch oven and return it to the hot oven.

Let it bake for 30 minutes with the lid on the Dutch Oven, then carefully remove the lid…

Then bake it for an additional 15 minutes or so WITHOUT the lid to allow the crust to brown.

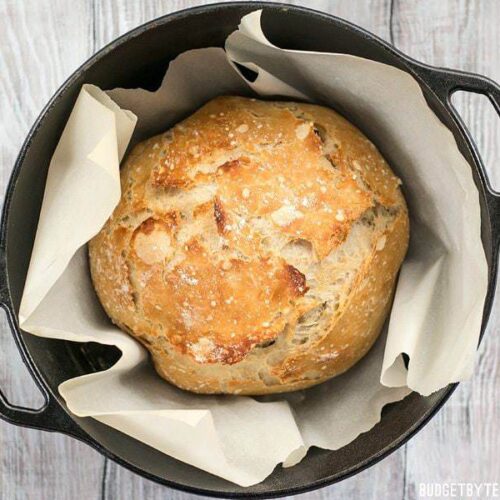
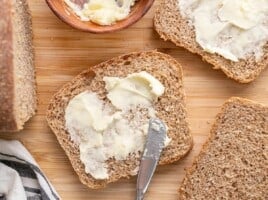
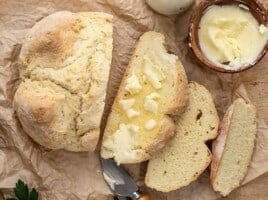
Once the crust achieves a nice deep golden brown color, carefully remove the Dutch Oven from the oven. Lift the no-knead bread out of the Dutch oven by the parchment, and allow it to cool before serving.

And just be prepared for the BEST bread you’ve ever made yourself. ;) The crust on this no-knead bread is seriously amazing.
No Dutch Oven and Short Fermentation Instructions
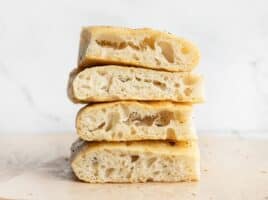
So, as I mentioned before, you can still bake this bread without a Dutch oven and with a short, 2-hour fermentation time. Here is a photo of my no-knead bread using just 2 hours of fermentation (plus another 1 hr rise time) and baked on a baking sheet.

If you only have about 2-3 hours to ferment the dough, you’ll need to increase the amount of yeast used to 2 tsp (instead of 1/4 tsp).
Let the dough ferment in the bowl for 2 hours, then shape it into a loaf, transfer it to a baking sheet covered with parchment (and sprinkled with cornmeal, if desired) and let rise for about another hour. I like to make slits in the top with a sharp knife after the loaf has risen. Be careful though, if the knife is not sharp enough or you use too much downward pressure, it can deflate the dough.
Brush the surface of the dough with water, then bake it in a preheated oven (again, as hot as the parchment will allow, usually around 425ºF) for 30-40 minutes, or until the crust is nicely browned.
I’ve made this twice and it was amazing! Hard to believe something so simple can come together to be something so amazing!
Question, can regular yeast be used if I’m out of Rapid rise instant yeast?
Great recipe! Everyone loves it at my house and it’s so quick and easy. Is it possible to split the recipe into two loaves? Any recommendations on bake times since they would be smaller?
Since we haven’t tested it, I’m hesitant to give you any specific suggestions that might not be successful. We do have a recipe for No-Knead Foccacia Rolls that you might enjoy, too! https://www.budgetbytes.com/focaccia-rolls/
But don’t let me stop you from giving it a shot! I’m sure with some tweaking it will work out great! I’d keep the baking temperature the same and use an instant-read thermometer as a guide to get the timing right (although the baking time will be roughly the same, too!). Check on the smaller loaves about 15-20 minutes into the first bake time. The center will register around 205*F once FULLY cooked, so when it hits somewhere around 190*F, you can remove the lid of the dutch oven and start browning the top of the loaf.
We have a great, budget-friendly thermometer in our Shop, if you need one! https://www.budgetbytes.com/shop/
So I have made this many times and everytime the dough is so wet I don’t know how you are able to form it into a ball. I use the least amount of water but it’s always so sticky that I can’t even touch it. It just sits in the counter spreading out for the second rise. It bakes great but is not a nice round loaf like I want. Any tips?
Since this is a no-knead bread recipe, the dough should be pretty sticky. (You’re not wrong!) I would suggest keeping the dough in the bowl while you form the ball rather than turning it out. Dust it with flour, and then if you don’t like to get your hands sticky (as I do not!) use two forks to pull the dough off the sides of the bowl and tuck it into the center (give the bowl a quarter turn, and repeat 3-5x until tight ball forms, then turn it out of the bowl. It will spread out and rise again, but shouldn’t be like the goo monster in Stranger Things. It should rise upward as well as spread out. ~ Marion :)
These recipes are great and I love your descriptions, method and format. Thank you Beth.
I used this recipe for the first ever bread I have made and it came out awesome. My family loved it. So I tried making it with whole wheat which came out just as awesome but better because it’s whole wheat… healthier. My wife said it’s better than the white. I did double the yeast because of other’s previous comments.
What is that weird dark spot on your bread pic? It looks like concentrated oil and pepper.
anyway this recipe absolutely works, as imprecise as it is. My family loves it. Omg you made homemade bread?! “Yeah it just took some doin.”
,
For years I was intimidated by making bread but this is fool-proof. Literally takes 5 minutes to mix up and then you just wait for the magic to happen. I’ve almost entirely stopped buying store bread in favor of this recipe. It’s cheaper and tastes infinitely better, not to mention it makes my house smell heavenly while it bakes.
Thank you for all the cheap and easy recipes. This site is raising my confidence in the kitchen. My family was so impressed when I told them I make bread from scratch… They don’t know how easy it is, ha!
Hi Beth! I just got into cooking/baking and have been religiously combing through your recipes. I have already tried a couple and all have been amazing! I’m wondering if you could tell me the difference between bleached and unbleached flour and when you use which. Thanks!
I don’t know very much about it, to be honest, but from what I understand one is just bleached (I’m not sure through what method or bleaching agents) purely for cosmetic reasons. I’ve made this bread with both and it works fine either way. If both were available at the store, I’d buy the unbleached because I don’t see the point of it. 😂
I’ve made this quite a few times and it is AMAZING. A couple of times, I roasted some garlic and added that and rosemary. Somehow even more amazing.
But, I’ve also had issues with adding it the next day (after the 18 hours), and I don’t know if it was because it got mixed too much…it turned out like a semi fluffy pancake.
If doing any mix-ins, when would you suggest adding?
I would definitely add any add-ins when you combine all the ingredients in the beginning. It is possible that the dough got overworked when you tried to add stuff in later. :)
Thank you so much Beth!! Will definitely try that :)
I’ve been making this bread for years and it’s a winner every time! I typically double the recipe and freeze one loaf for later. I use a 50/50 blend of white whole wheat flour and AP flour, and 2.75 – 3 cups of water. I use less salt than the recipe calls for — only about 1 tsp — due to dietary restrictions and it still has great flavor due to the overnight fermentation. Since it is a wet dough, I find it helpful to use a round proofing basket for the second rise. I pull off half the dough, shape into a loose round, and proof in the basket. Then while the first loaf is in the oven, I proof the second loaf in the basket and pop it in in the same hot dutch oven when the first loaf comes out.
I used two cups of all-purpose flour and one cup of whole wheat flour. When I turned the dough out for baking, it was really sticky. I wonder if that had to do with my choice of flour, or did I use too much water? Anyway, I had to add nearly a cup more flour to make it manageable.
No Dutch oven, so I used a ceramic baking dish. I baked it at 410F for 35 minutes with the lid, and another 13 minutes without the lid. The end result was wonderful! :P
Bill, I was in an RV without proper tools. Used a Pyrex mixing bowl with a disposable pie tin for a lid. Wasn’t the prettiest loaf but tasted great. One of my best ‘make-dos”.